from fairdatanow import DataViewer, login, filters
import osExploring half a million molecules
Zooming into high resolution mass spectrometry data
Exploring our Nextcloud data
For our ASAP project research team we created a Nextcloud folder that we can use to easily explore and access all uploaded data in our project with fairdatanow Python package. Let’s take a look what Wim has uploaded so far…
In the gif animation below we start with an empty search string to explore all data files in the Nextcloud, and subsequently interactively narrow down the selection until we have located all files that we need for our today’s purposes.
As it turns out there is an interesting subset of files that contain the string lange. So let’s filter the file list by typing lange and hit Enter key in the search bar. In the filters menu I can further restrict the file selection to include only specific file extensions. In this example I decide I only want to see .raw files.
url = 'https://laboppad.nl/asap-data'
dv = DataViewer(login(url), **filters(search=''))
dv
Connection with nextcloud server is ok.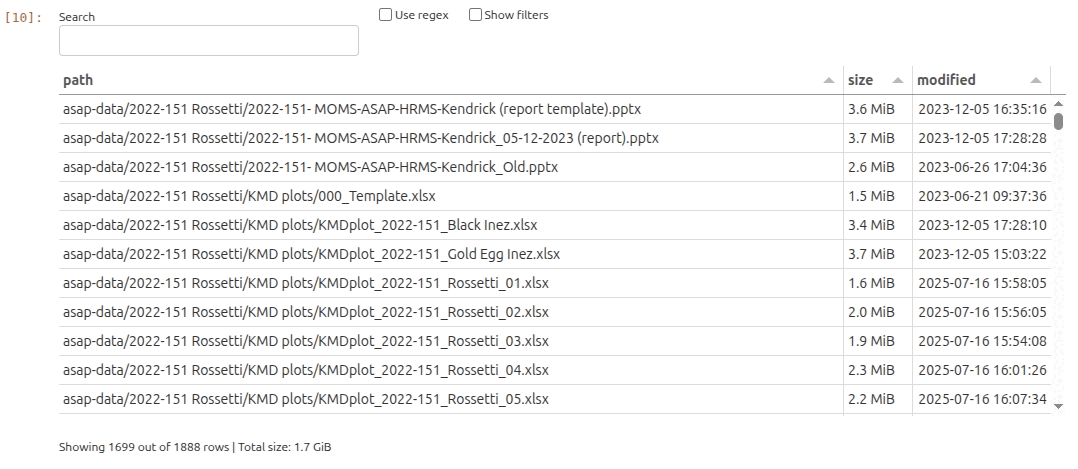
You can now download the filtered files to the cache location of your local computer using the .download_filtered() method on the DataViewer instance directly.
files = dv.download_filtered()Ready with downloading 55 selected remote files to local cache: /home/frank/.cache/fairdatanow However, in order to skip all of this interactive searching next time, it is better to rerun the complete download command with the proper search filters directly.
url = 'https://laboppad.nl/asap-data'
dv = DataViewer(login(url), **filters(search='lange', extensions=['.raw']))
files = dv.download_filtered()
Connection with nextcloud server is ok.
Ready with downloading 55 selected remote files to local cache: /home/frank/.cache/fairdatanow The list of downloaded files on your computer is stored in the files variable. Let’s take a look at the file paths in our local cache directory.
print('(Skipping first 35 items)')
for i, file in enumerate(files):
    if i > 35:
        print(i, file)
(Skipping first 35 items)
36 /home/frank/.cache/fairdatanow/asap-data/2025 Théo-Fany Lange - the dutch method/xcalibur raw data files/Matt_Joana_100-24-1_01.RAW
37 /home/frank/.cache/fairdatanow/asap-data/2025 Théo-Fany Lange - the dutch method/xcalibur raw data files/Matt_Joana_100-24-2_01.RAW
38 /home/frank/.cache/fairdatanow/asap-data/2025 Théo-Fany Lange - the dutch method/xcalibur raw data files/Matt_Joseba_01.RAW
39 /home/frank/.cache/fairdatanow/asap-data/2025 Théo-Fany Lange - the dutch method/xcalibur raw data files/Matt_Julia_T1_01.RAW
40 /home/frank/.cache/fairdatanow/asap-data/2025 Théo-Fany Lange - the dutch method/xcalibur raw data files/Matt_Julia_T2_01.RAW
41 /home/frank/.cache/fairdatanow/asap-data/2025 Théo-Fany Lange - the dutch method/xcalibur raw data files/Matt_Marina_MFH_A_01.RAW
42 /home/frank/.cache/fairdatanow/asap-data/2025 Théo-Fany Lange - the dutch method/xcalibur raw data files/Matt_Marina_MFH_B_01.RAW
43 /home/frank/.cache/fairdatanow/asap-data/2025 Théo-Fany Lange - the dutch method/xcalibur raw data files/Matt_Marina_MFH_C_01.RAW
44 /home/frank/.cache/fairdatanow/asap-data/2025 Théo-Fany Lange - the dutch method/xcalibur raw data files/Matt_Rosie_01.RAW
45 /home/frank/.cache/fairdatanow/asap-data/2025 Théo-Fany Lange - the dutch method/xcalibur raw data files/Matt_WAM_A_(1920.95)_01.RAW
46 /home/frank/.cache/fairdatanow/asap-data/2025 Théo-Fany Lange - the dutch method/xcalibur raw data files/Matt_WAM_B_(1970.80)_01.RAW
47 /home/frank/.cache/fairdatanow/asap-data/2025 Théo-Fany Lange - the dutch method/xcalibur raw data files/Matt_WAM_C_(1901.50)_01.RAW
48 /home/frank/.cache/fairdatanow/asap-data/2025 Théo-Fany Lange - the dutch method/xcalibur raw data files/Matt_WAM_Ref1_01.RAW
49 /home/frank/.cache/fairdatanow/asap-data/2025 Théo-Fany Lange - the dutch method/xcalibur raw data files/Matt_WAM_Ref2_01.RAW
50 /home/frank/.cache/fairdatanow/asap-data/2025 Théo-Fany Lange - the dutch method/xcalibur raw data files/Matt_WAM_Ref3_01.RAW
51 /home/frank/.cache/fairdatanow/asap-data/2025 Théo-Fany Lange - the dutch method/xcalibur raw data files/Matt_WAM_Ref4_01.RAW
52 /home/frank/.cache/fairdatanow/asap-data/2025 Théo-Fany Lange - the dutch method/xcalibur raw data files/Matt_WAM_Ref5_01.RAW
53 /home/frank/.cache/fairdatanow/asap-data/2025 Théo-Fany Lange - the dutch method/xcalibur raw data files/Matt_WAM_Ref6_01.RAW
54 /home/frank/.cache/fairdatanow/asap-data/2025 Théo-Fany Lange - the dutch method/xcalibur raw data files/Matt_WAM_Ref7_01.RAWWith the valuable data files now cached on our local computer, we can now actually start to take a look at them!
Reading our first .raw file
Nice! We are now ready to actually explore the data. First step is to read an .raw file containing (already scan-centroided) ASAP-HRMS data. The data can be loaded into a positive and a negative mode dataframe as with the read_raw() function which returns two dataframes for positive and negative mode. This function is based on the pyRawTools python package. Let’s take a look at Matt_Joana_100-24-1_01.RAW.
from kendrick import read_rawraw_file = files[36] #
raw_file'/home/frank/.cache/fairdatanow/asap-data/2025 Théo-Fany Lange - the dutch method/xcalibur raw data files/Matt_Joana_100-24-1_01.RAW'df_pos, df_neg = read_raw(raw_file)Let’s focus on the positive mode data for now. Here is what the first and last rows of the dataframe looks like.
df_pos| RT | mz | inty | |
|---|---|---|---|
| Scan | |||
| 1 | 0.00559 | 91.039505 | 9.846962e+04 |
| 1 | 0.00559 | 91.057877 | 4.731688e+04 |
| 1 | 0.00559 | 93.037094 | 1.971464e+05 |
| 1 | 0.00559 | 93.070290 | 4.869656e+05 |
| 1 | 0.00559 | 94.065620 | 8.750284e+04 |
| ... | ... | ... | ... |
| 381 | 3.00519 | 607.520447 | 9.569468e+05 |
| 381 | 3.00519 | 610.541321 | 6.589495e+05 |
| 381 | 3.00519 | 612.554993 | 1.010656e+06 |
| 381 | 3.00519 | 625.531311 | 8.286563e+05 |
| 381 | 3.00519 | 629.560425 | 6.005925e+05 |
151081 rows × 3 columns
Inspecting the df_pos dataframe we find 151018 rows with a Scan number index and three columns: 1) RT retention time, 2) mz mass per electrical charge, and 3) inty number of ions. From the first column one can see that this experiment lasted 3 minutes.
As we will see, m/z values for identical molecules are slightly jittered due to limited instrumental precision. In order to determine the abundance of different molecules present in the sample, we now need to create time averaged centroided m/z values. This can be achieved by 1) first binning the data in a histogram, 2) then Gaussian smoothing the histogram and locating the peaks. These steps are implemented in the functions histogram() and get_time_averaged_centroids().
Next step is to explore the data in an interactive visualization. In order to plot half a million data points in a single plot we need to import a special function interactive_plot(). This function makes heavily use of a powerful python package datashader that is designed for fast plotting huge numbers of data points.
Note
Note that in order to activate interactive plotting in a Jupyter notebook you need to execute the following notebook magic command in a code cell: %matplotlib widget
from kendrick import histogram, get_time_averaged_centroids, interactive_plotmz_hist = histogram(df_pos)
mz_centroids = get_time_averaged_centroids(mz_hist)
interactive_plot(df_pos, mz_hist, mz_centroids, title='Matt_Joana_100-24-1_01.RAW (+)')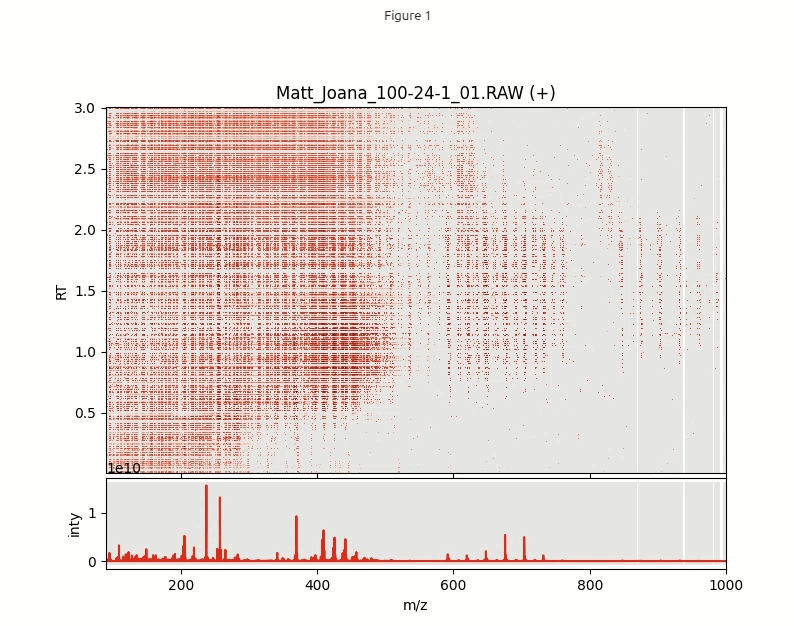
FUNCTIONS
interactive_plot
def interactive_plot(
    df, mz_hist, mz_centroids, title:NoneType=None
):
Create interactive plot for dataframe df.
get_time_averaged_centroids
def get_time_averaged_centroids(
    mz_hist_w_xy
):
Get peaks (centroids) from histogram.
histogram
def histogram(
    df
):
Create intensity weighed histogram.
read_mzml
def read_mzml(
    mzml_file
):
Read mzml_file.
Returns positive and negative mode dataframes df_pos and df_min.
read_raw
def read_raw(
    raw_file
):
Read raw_file into positive and negative mode data frames.